Bitmap2LCD is a tool for programming small Graphic LCDs in embedded systems.
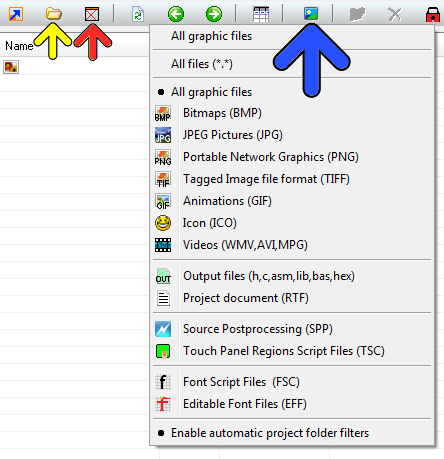
File Explorer : Filter Settings
In the file explorer, you can show/hide the folders in the list (yellow arrow) , Show all files or only the files made today (red arrow) and filter the list by their extension and type (blue arrow) and the panel below the blue arrow.
The filter status can be seen in the file count string which is shown in the statusbar at the right at the top of the window .