Category Archives: Animations and GLCD

Animations on Graphic LCD (GLCD)

Animations on Graphic LCD (GLCD)

With Bitmap2LCD, you can easily edit and play GLCD animations.

The goal is to create buttons with status dependent graphic effects, device power on and power off splash screens, animated logos, moving icons, display of analog gauges, creating impressive GLCD demos, symbolic displays of actions in progress or to show the current machine operation,  or an animated hourglass cursor to name a few.

One of the many interesting features of Bitmap2LCD is the support of GIF files.

To summarize , the GIF format supports up to 8 colors per pixel depth (max 256 colors) and also supports animations and allows a separate palette of 256 colors for each frame.

wikipedia about GIF

Here’s an example of a short animation made with Bitmap2LCD called HalfEmptyGlass.gif ( Monochrome, 28 frames )

Click on the image if you want to play the animation

The animation sequence is made of frames that you can handle inside Bitmap2LCD as single images.

There’s a built in animation sequence player , similar to a video player with Play/ Stop / pause /rewind /next frame / previous frame buttons.

When the animation is ready, you can export the animation in one run and click to a set of data arrays, with or without data compression, in case of a monochrome data output.

A GIF animation is a collection of images


Animation features of Bitmap2LCD

  • Import all frames of a GIF file inside the Work Canvas
  • Import a single frame of a GIF file as graphic
  • Import single images one by one into an animation and save it as a GIF
  • Create an animation from scratch
  • Remove, insert, add  frames in the animation
  • Play the animation sequence
  • Export animation to data arrays in one run


Import a GIF animation
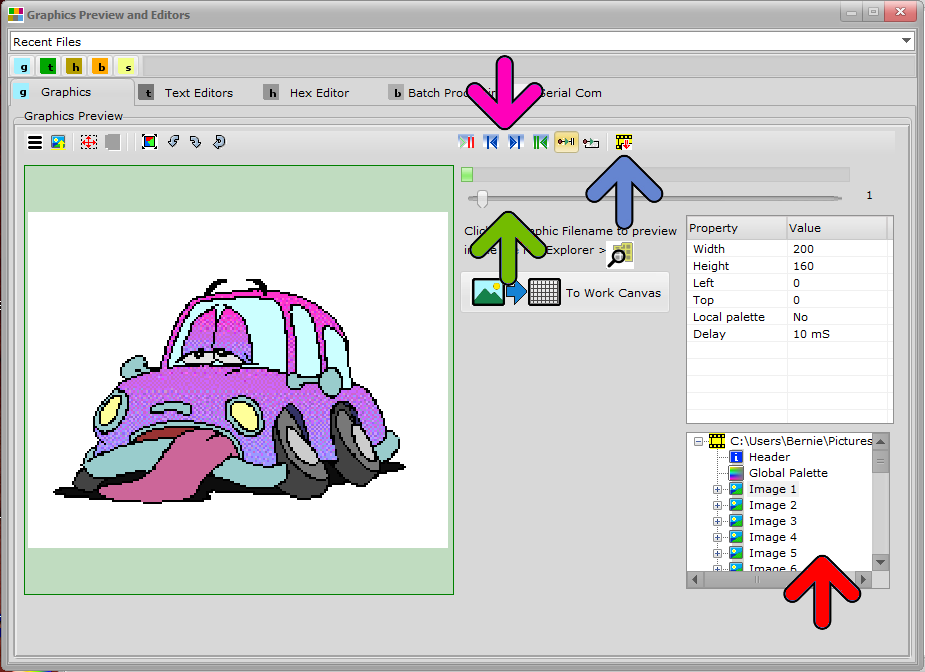
When clicking inside the File Explorer file-explorer on the filename of a GIF file, You can 1) import a single frame from inside a GIF as a single graphic, or 2) import all of the frames of the animations inside the Work Canvas (GIF Import button -> blue arrow)

In the Graphics Preview Window, you can also play the animation (purple arrow) , find a specific frame using the track bar (green arrow) or browse the GIF using the GIF Components Browser (red arrow)

P57BU2H9V2FH

bitmap2lcd-glcd-animation_1

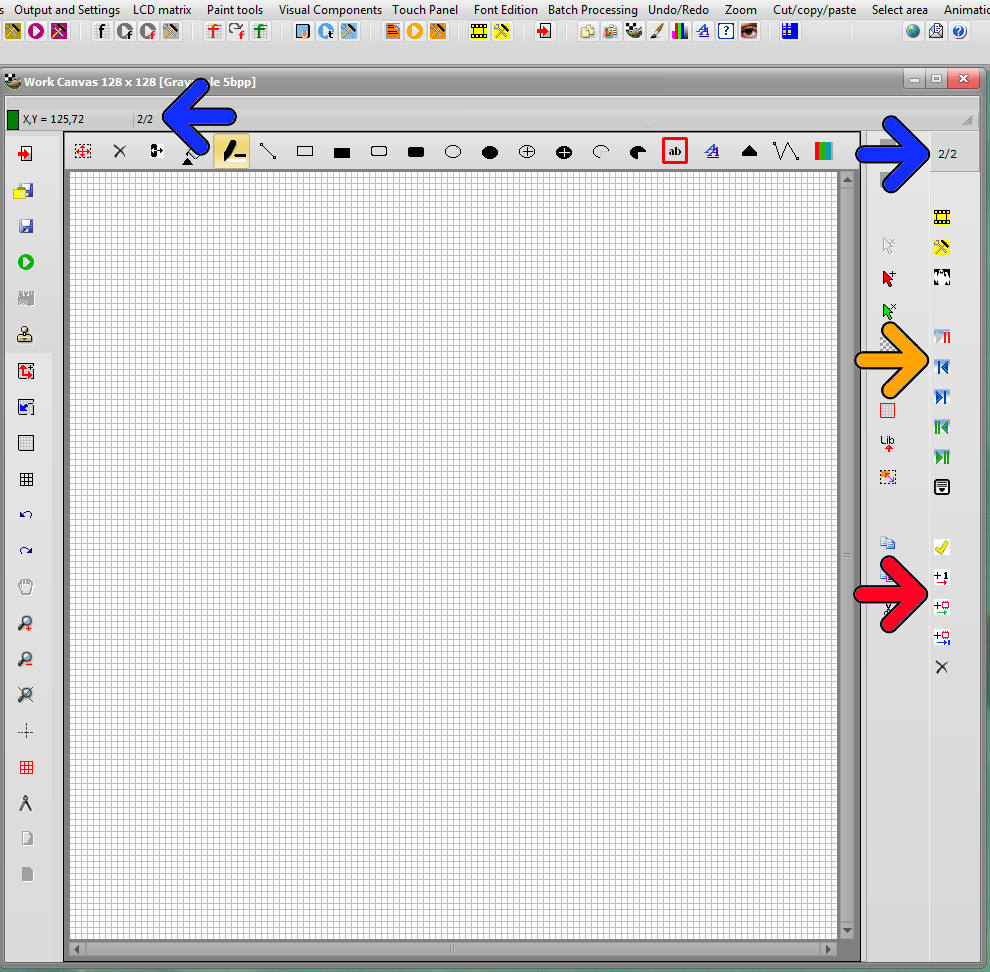
1) Graphic Preview ) GIF Import button -> blue arrow

bitmap2lcd-glcd-animation_2

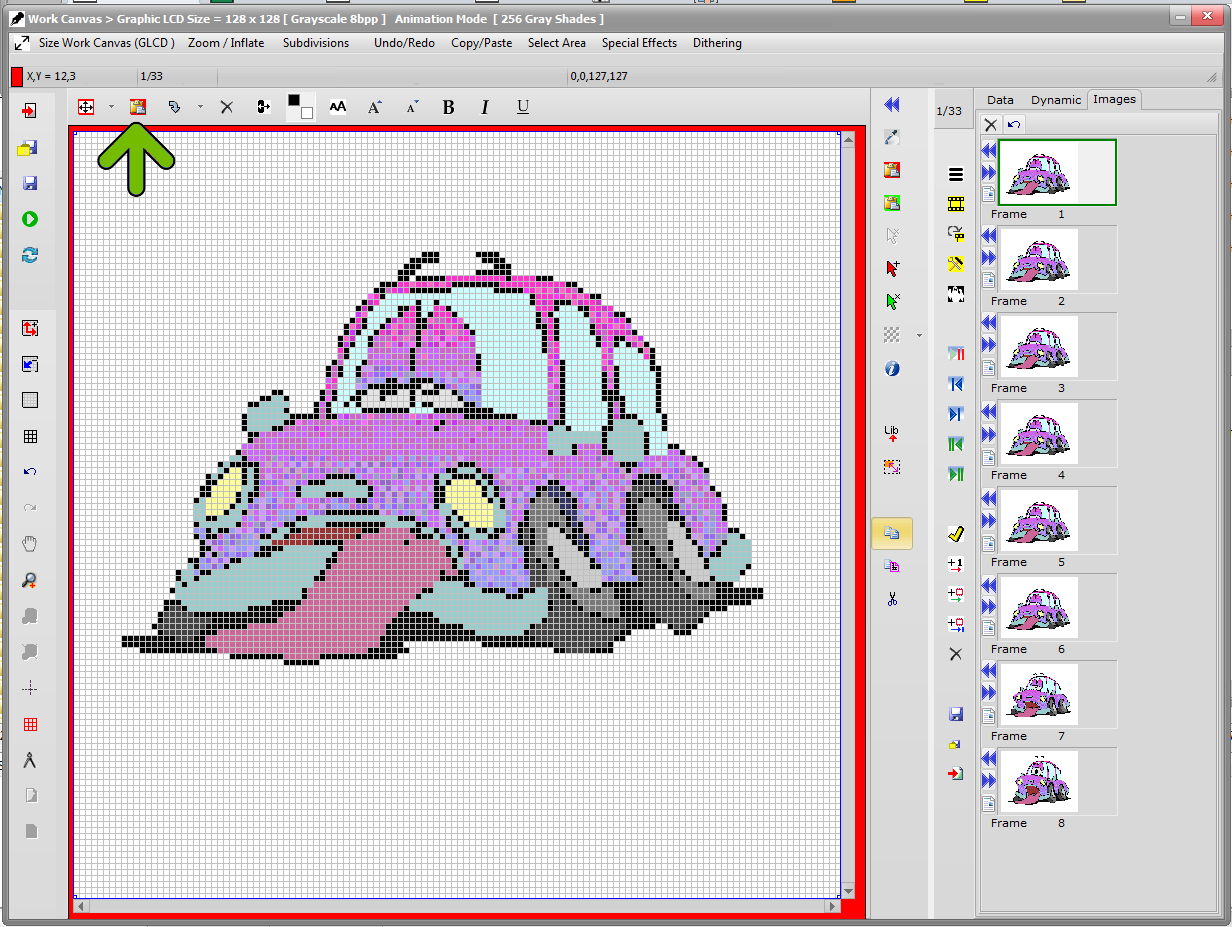
2) Work Canvas ) Paste button -> green arrow

bitmap2lcd-glcd-animation_3

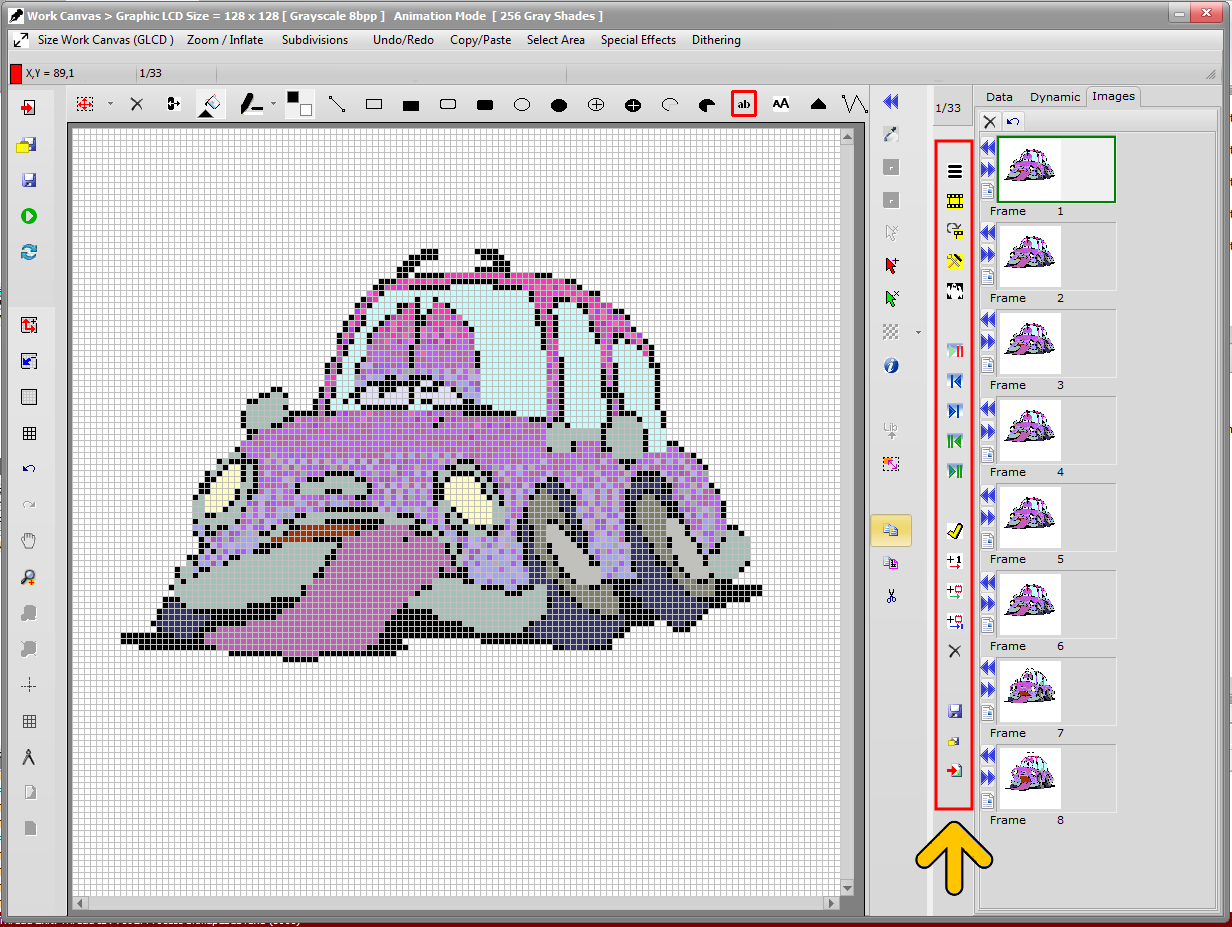
3) Work Canvas ) Edit Animation -> Yellow arrow -> Red frame

4) Start Export animation to data arrays

bitmap2lcd-glcd-animation_data_array_1

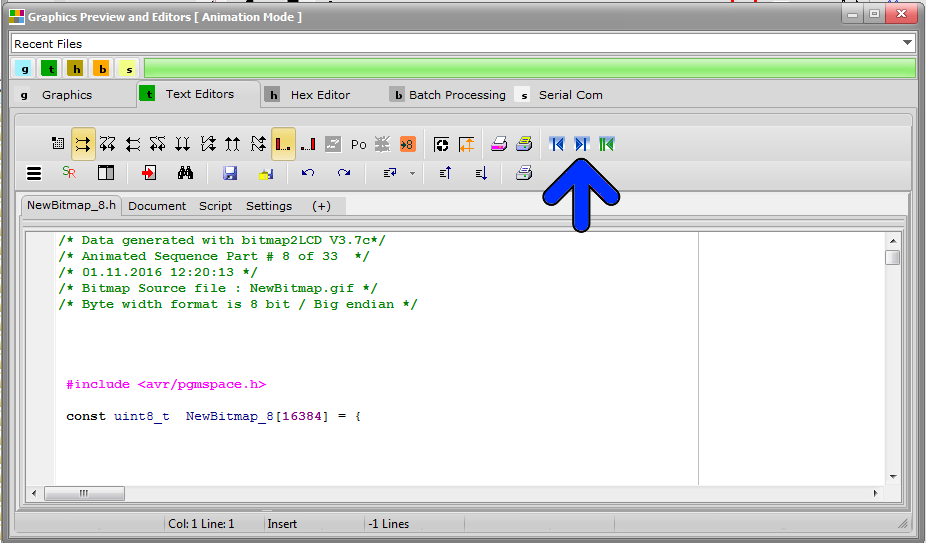
5) Text editors ) Browse data array files (blue arrow)

bitmap2lcd-glcd-animation_data_array_2

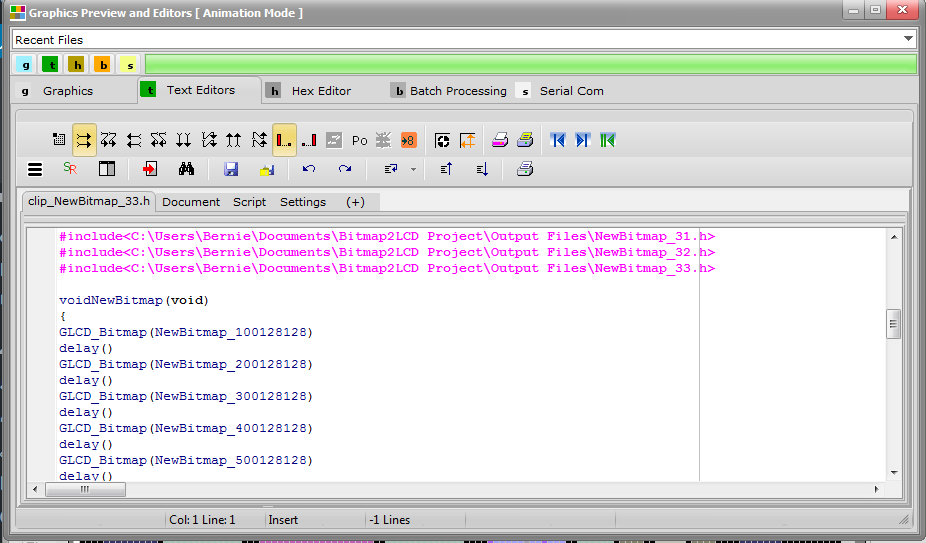
6) Text editors ) Check the clip unit 

( Filename format : clip_ArtWorkName_NumberOfFrames.h )

Creating a GLCD Animation from scratch with Bitmap2lcd

Creating a GLCD Animation from scratch with Bitmap2lcd

Bitmap2LCD is a tool for programming small Graphic LCDs in embedded systems.

Also read this article !

Let’s see how we can create an animation for small Graphic LCD ( Version 3.7C+ )

bitmap2lcd-animation-menu

  • When in static mode , go to the animation tab and click the Enter Animation button anim  The same button or the Special Mode Exit exiz Button should later be used to exit from the animation mode back to the static mode. An animation will be saved as a standard GIF file.

 Read more about GIF Format

  •  When entered in animation mode, the canvas outline becomes dark gray (green arrow) sub-menu becomes accessible (red arrow) . The animation is a sequence built of frames. The “ghost image” of the previous frame can optionally be displayed, it is a visual help for correct placement of graphic items,
  • bitmap2lcd-animation-mode_1
  • At the top you can read the number of the current frame  (2)  and the number of total frames in the animation (/2) (blue  arrow)
  • In the animation menu , you can use the navigation buttons to move from a frames to another, move to the beginning or the end of the animation. You can play and stop the animation sequence. (orange arrow) An alternative is to use the page-up and page-down keyboard keys to move through the animation frames.
  • Addition of a new animation frame, copying current frame to then next new frame , deleting a frame as well as other animation management functions are located in the animation menu and at the right side of the work canvas (red arrow)

Bitmap2lcd Animation_3

  •  When the animation is done you can convert the frames in GLCD data in one go Start  (green arrow)
  • With this animation made of 5 frames example, Bitmap2LCD produces 6 files : A clip unit file  (the code in the editor) and the 3 frames as data files  (orange  arrow)
  • You can navigate and view these files with the next and previous buttons  (red arrow)
  • Only selected part of the animation frames can be converted : Enable Display Paging Scheme Limits and then select the area to convert. Click conversion button to start data export as usual (green arrow)

Bitmap2lcd Animation_4


  •  In this example, 5 full frame size of data for  a 128 x 128 pixel GLCD are converted (black arrow). If the “Auto-framing” option has been enabled in the configuration settings, an automatic framing of only the area of the changing pixels is made. Then the X and Y positions, the height and the width of the frame is reported inside the clip unit.
  • In the configuration settings window toolAnim , find other animation settings on the “clip unit” panel.
  • In the monochromatic mode, in addition to then auto-framing, an animation output can optionally be “internally compressed” to generate reduced code size. ( read articles in the blog category GLCD Data compression )