Bitmap2LCD : Reference Graphics for Color Palettes
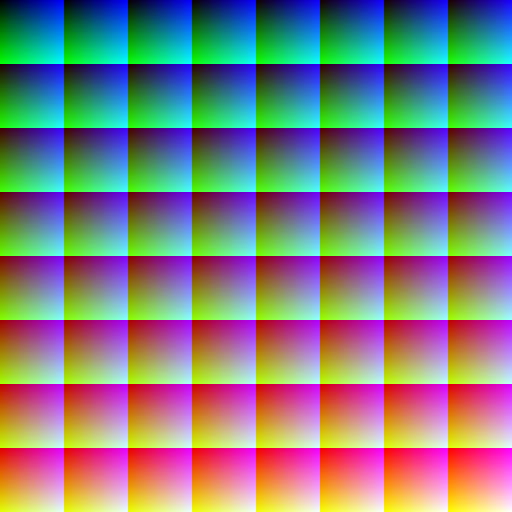
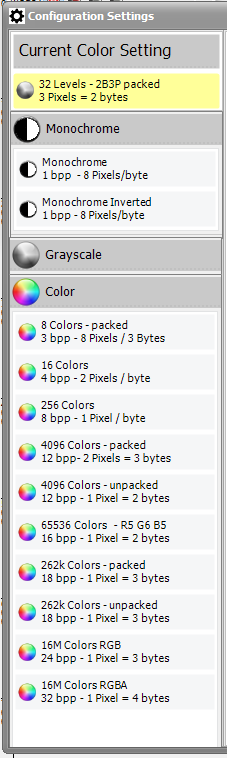
256 colors ( 8bpp )
4096 colors ( 12bpp )

(262k) 262144 colors ( 18 bpp )
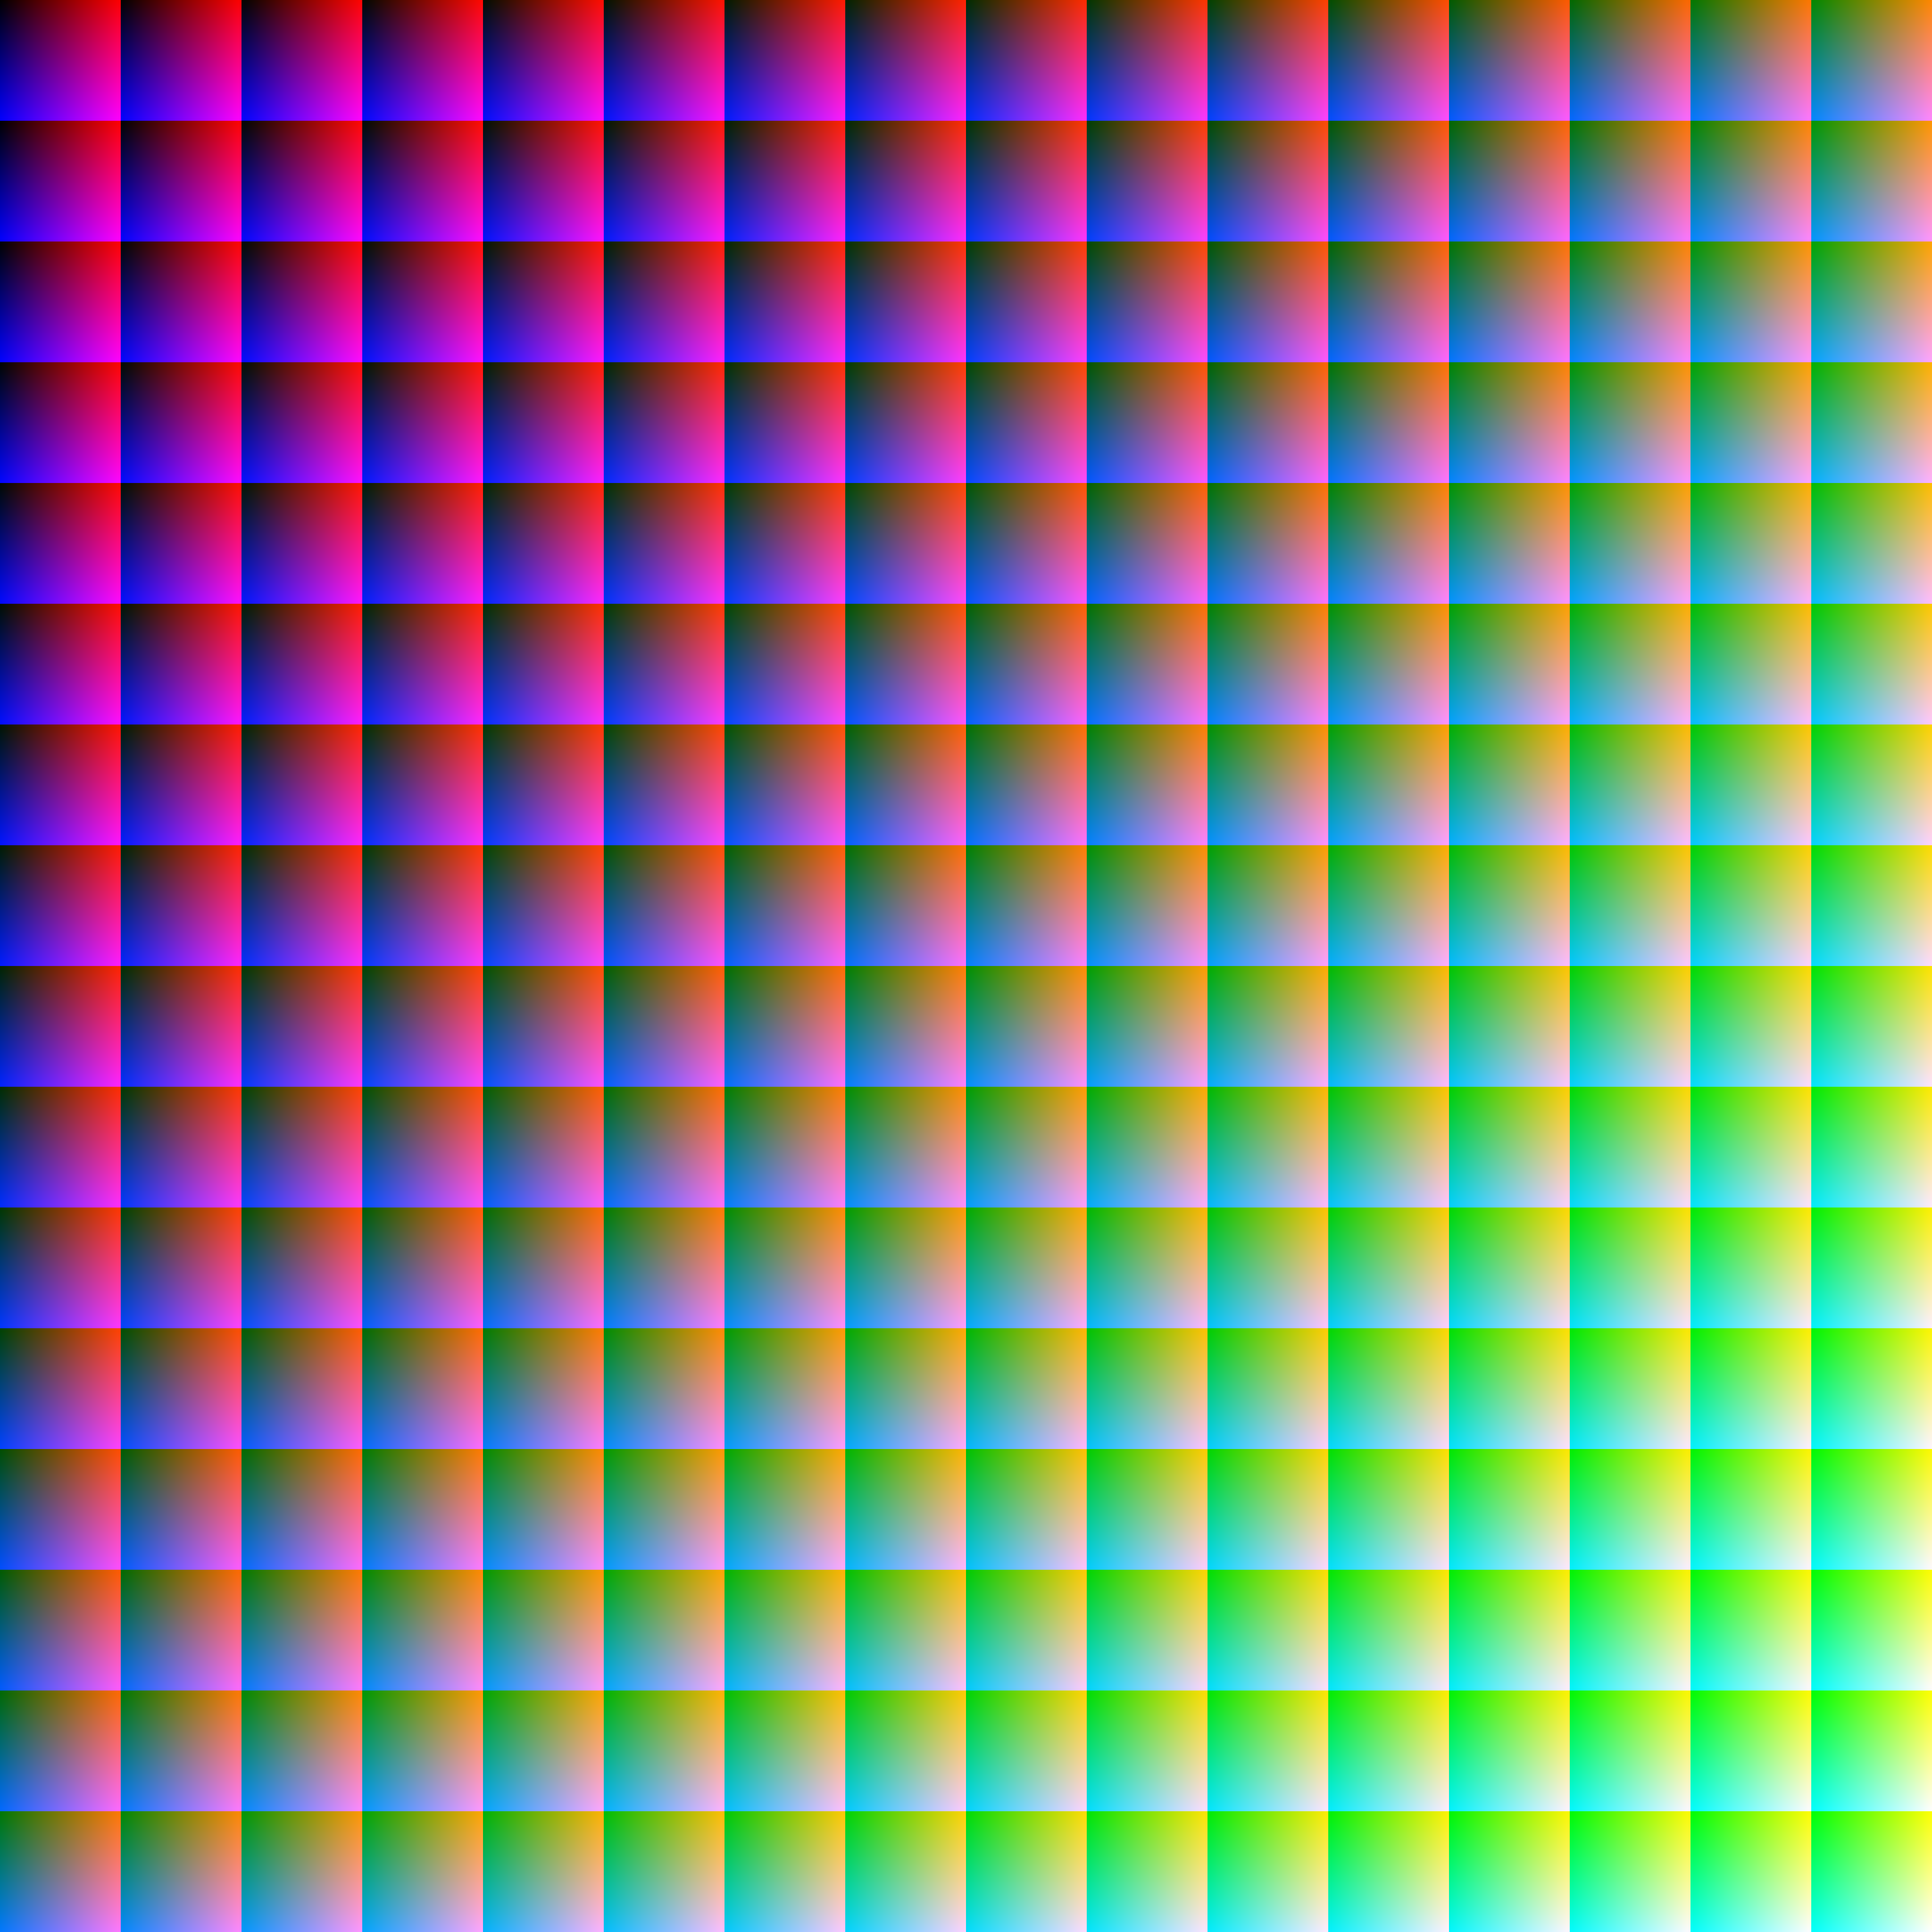
(16 Million) 16777216 Colors ( 24 bpp )
256 colors ( 8bpp )
4096 colors ( 12bpp )
(262k) 262144 colors ( 18 bpp )
(16 Million) 16777216 Colors ( 24 bpp )
From V3.8e , the above functions have been moved to the COLOR PALETTE tab , Main Menu

In the Output + Settings / Main menu, for the color mode range going from 256 to 262k Colors you can load a Custom Color Palette by loading a graphic file (BMP/JPG/PNG) that contains the exact number of reference colors, for example 256 Colors for the Custom 256 colors Palette.
The “Custom Color Palette” will override the “Default Color Palette” in a particular project other than Default.LCD (see below about projects)
To load a custom color palette, just create/switch to a project different than Default.LCD and switch to the correct color mode (for example 256 colors), then click on the “Load a custom Color Palette” item in the Output + Settings main menu (blue arrow). The Color Palette of the Reference Graphic will then be loaded.
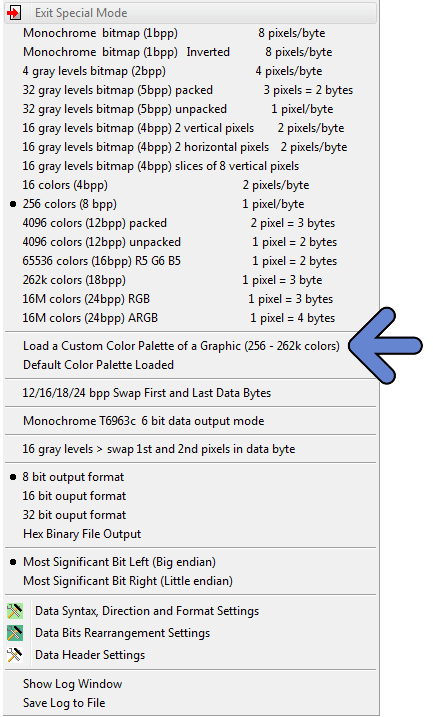
The next line in the main menu, below the blue arrow will show you if the Default or the Custom Color Palette has been loaded.
To delete a Custom Color Palette, delete the project name, for example, MyProject.LCD
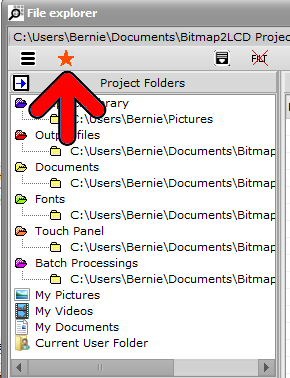
In the File Explorer >>
List the projects (red arrow)
Name of the current active project (blue arrow) >> NewProject.LCD
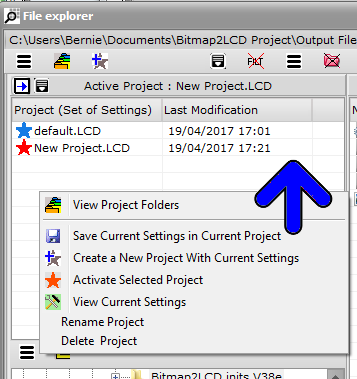
Below the List of Projects ( each project is a set of many possible settings )
A Red Star indicates the active project name
Use Right Mouse Click or local menu to act on projects.
From V3.8e , the above function has been moved to the COLOR PALETTE tab , Main Menu
( From V3.2e Build 4 to V3.8d )
In the Output + Settings main menu, in the 256, 4096, 65536 and 262k Colors mode you can export the default or custom Color Palette to a text file. ( RGB 24bit Color Hex codes )
The exported file will be saved in the project output files folder
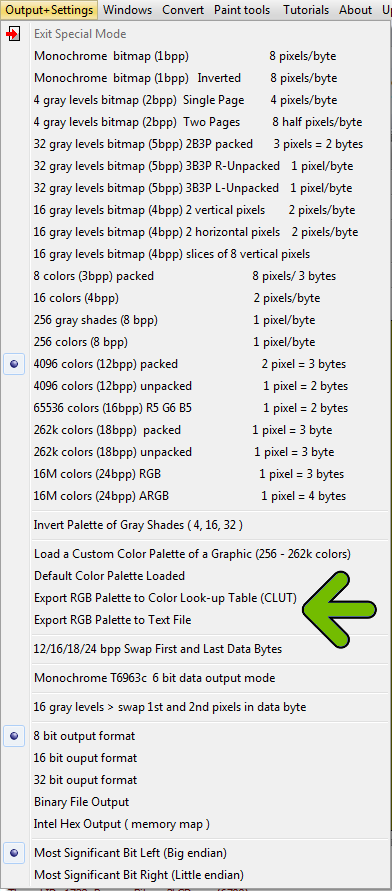
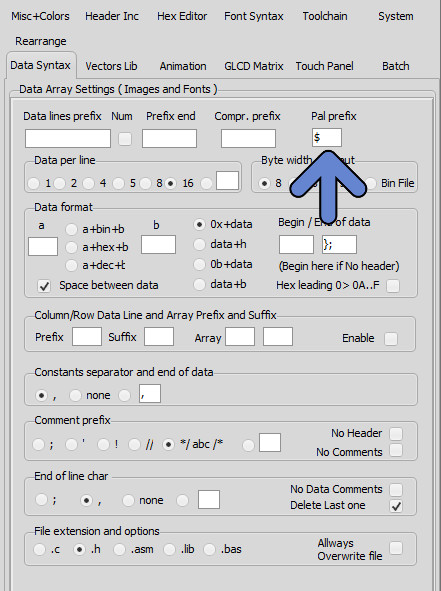
The prefix of the RGB 24bit Color Hex codes can be defined in the settings ( data Syntax Tab )
Bitmap2LCD is a tool for programming small Graphic LCDs in embedded systems and a programmable graphic and text processing tool.
Update >V3.9a
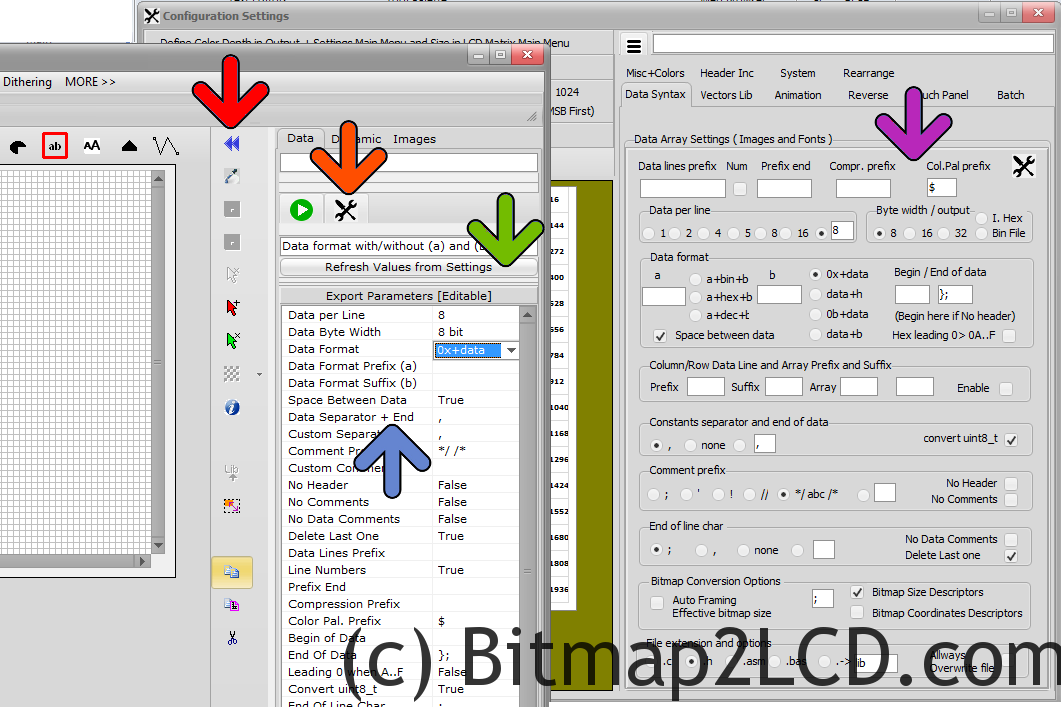
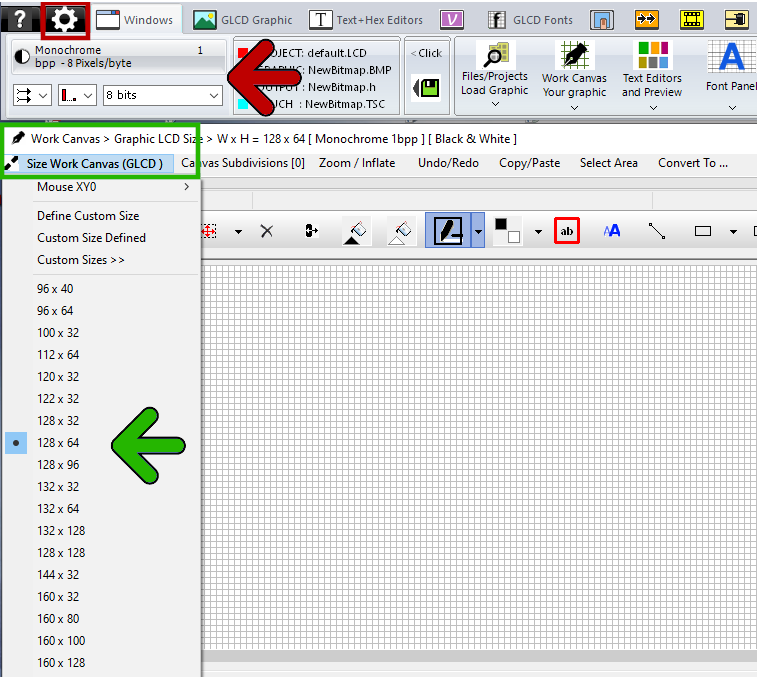
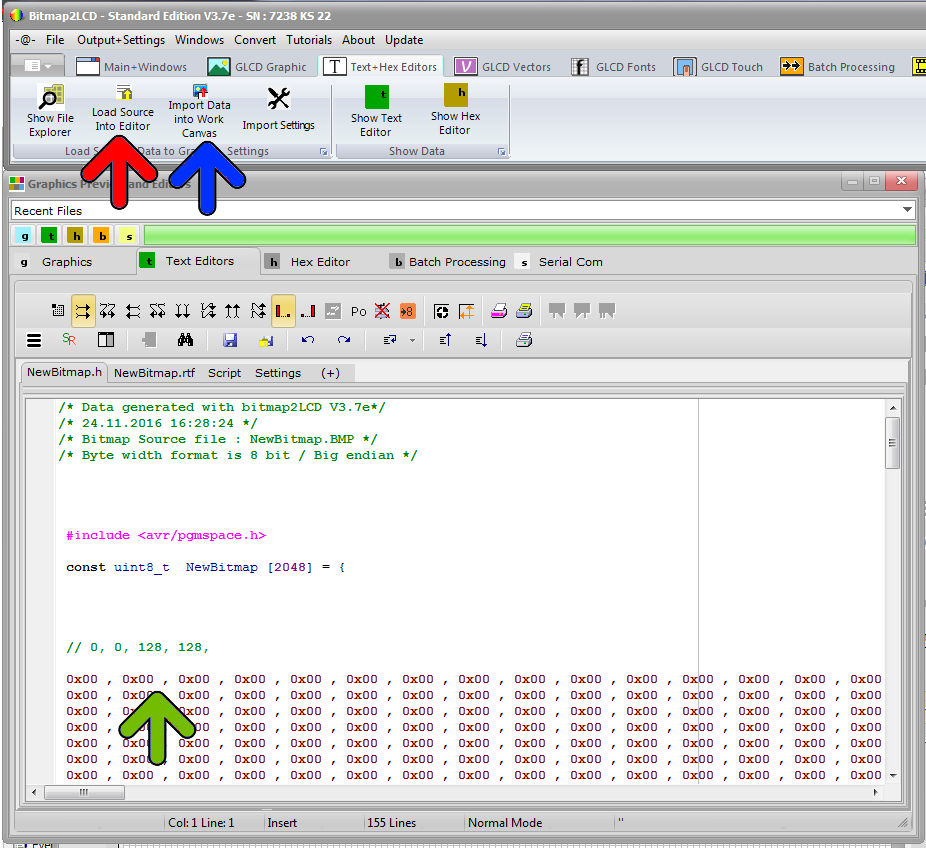
From Version V3.9a the Configuration Settings have been moved to a single panel accessible from the main menu. (red Arrow)
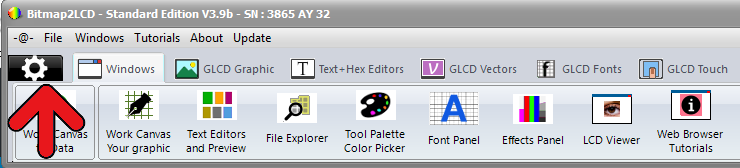

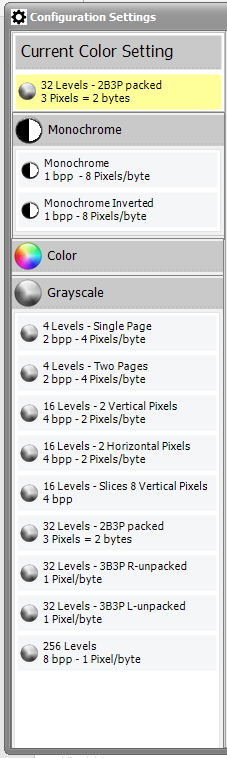
The Monochrome / Grayscale / Color Setting can be found in the same Window
Versions V3.8a – V3.8z
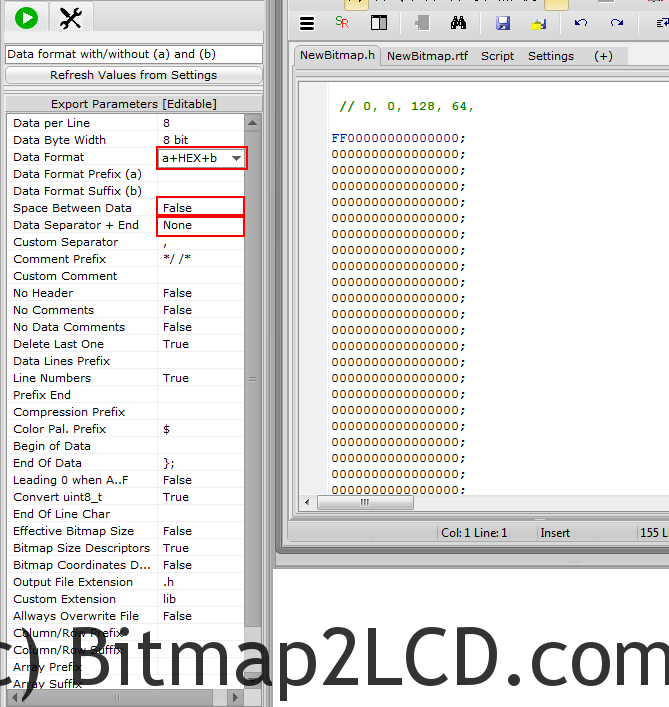
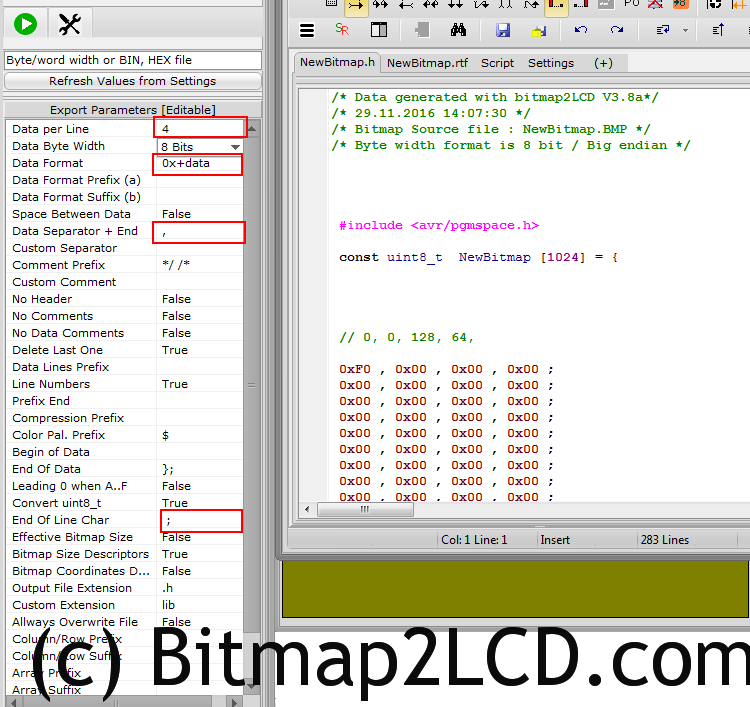
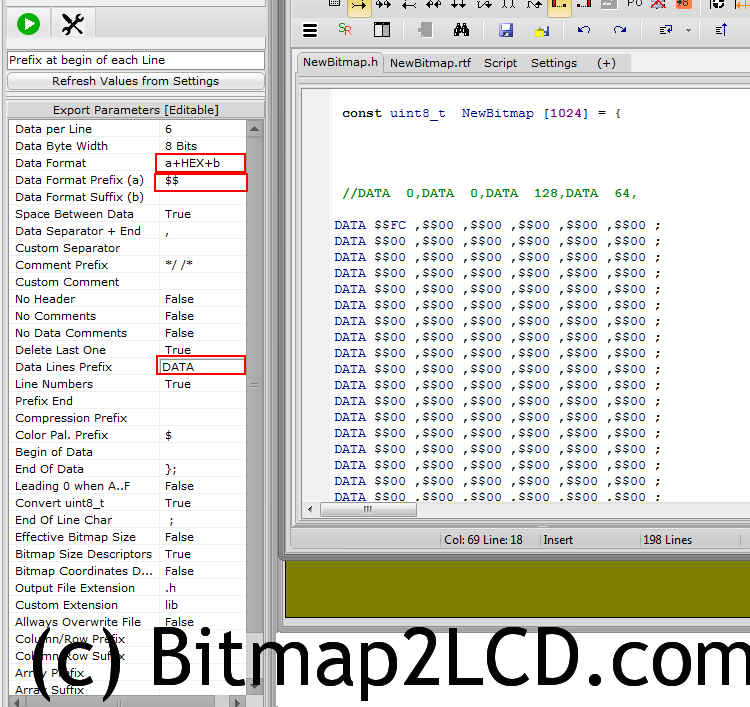
From V3.8a, the parameters (blue arrow) located inside the right panel of the Work Canvas ( hide/ show > red arrow ) are editable.
The Export To Data Settings are the same as those located on the Configuration Settings Windows. (purple arrow)
Note : Some of these settings are also valid for the Fonts Generator !
You can change the export settings from there (blue) . Their value will be copied to the Configuration Settings Windows (purple)
If changes are made in the Configuration Settings Windows, the values might be refreshed (Refresh Values from Settings > green) on the Work Canvas Panel
Bitmap2LCD is a tool for programming small Graphic LCDs in embedded systems and a programmable graphic and text processing tool.
Update V4.7b >
Presentation of Bitmap2LCD (Youtube)

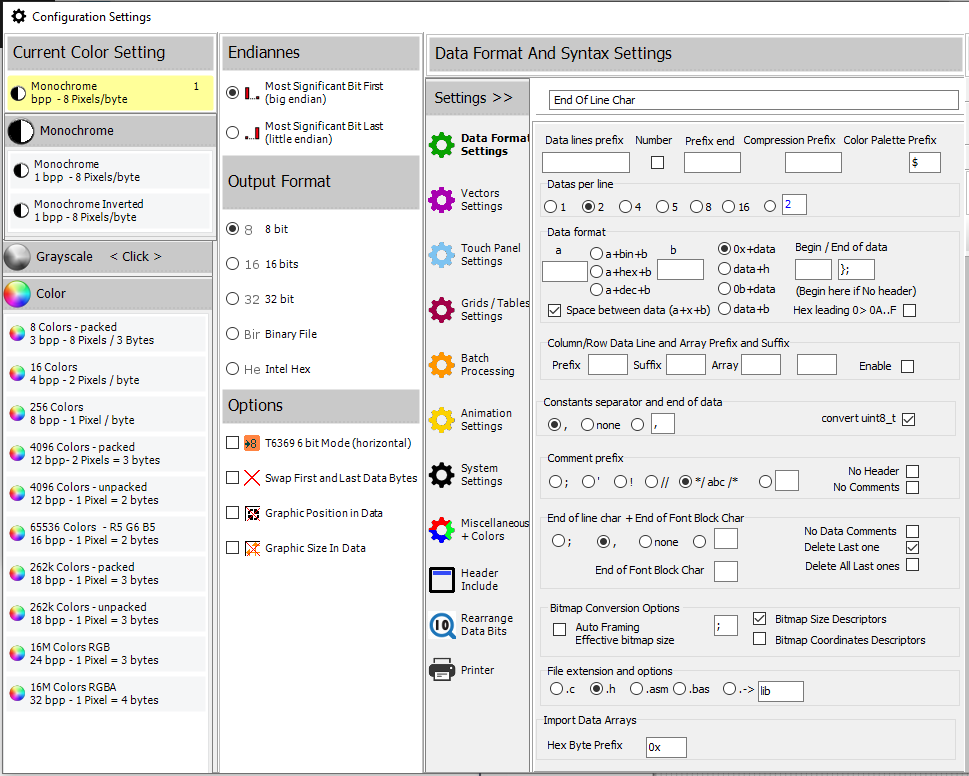
Configuration Settings : Monochrome, Color and Grayscale, Data formats etc…
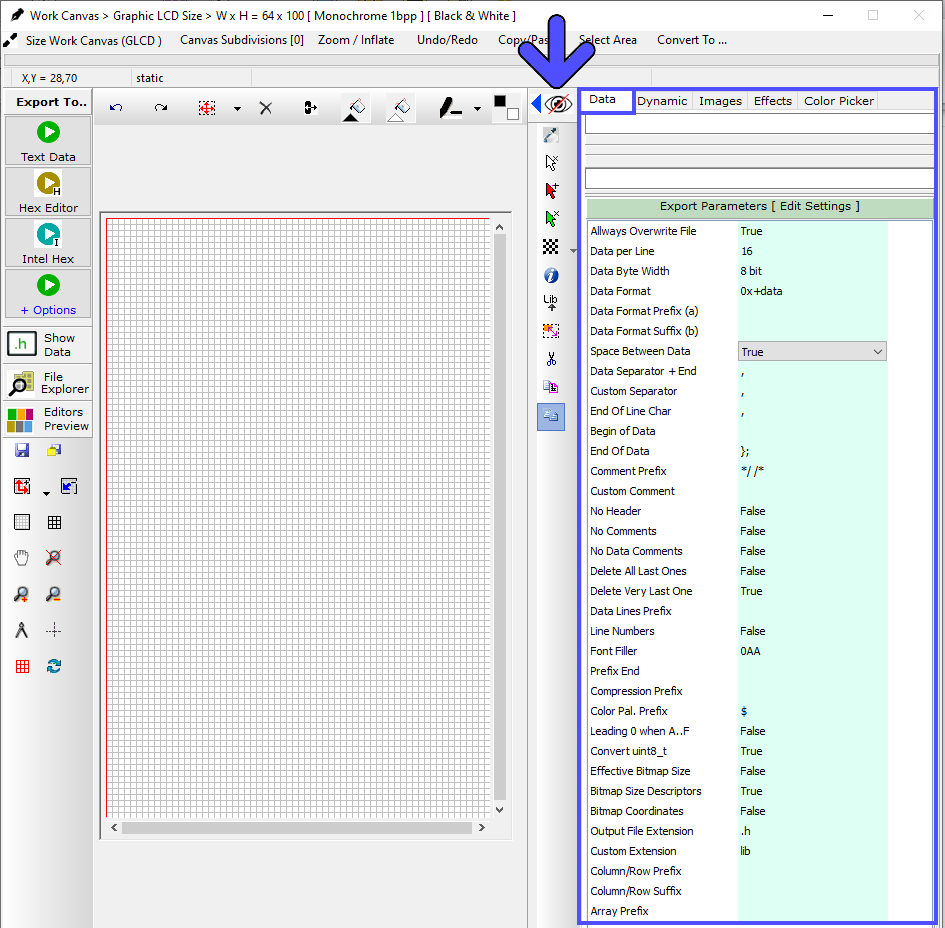
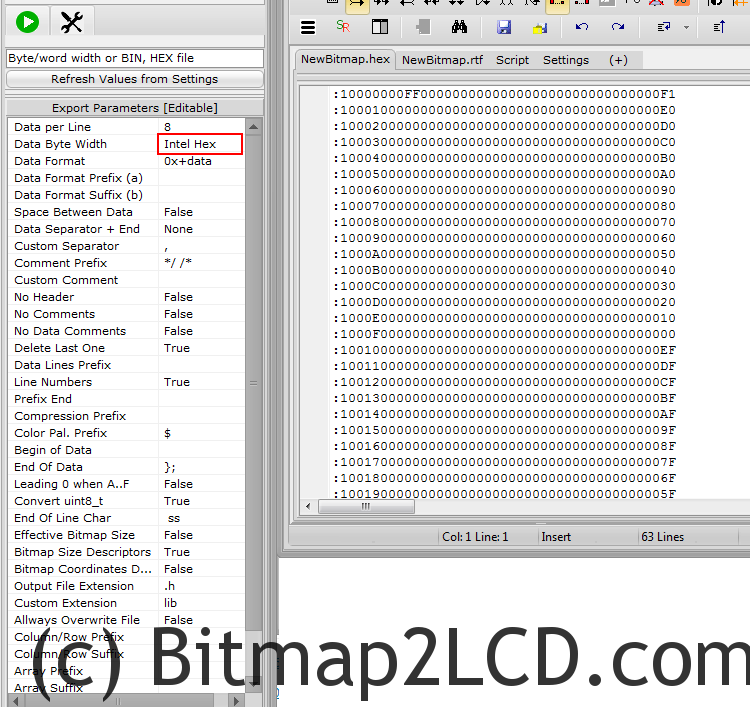
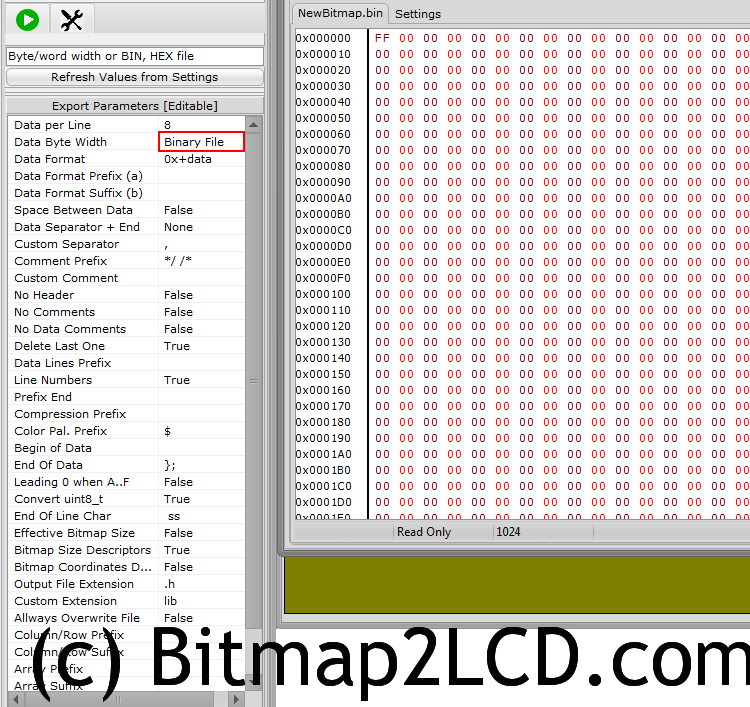
The Data Format Settings are also located in the right panel of the Work Canvas. (blue arrow and frames)
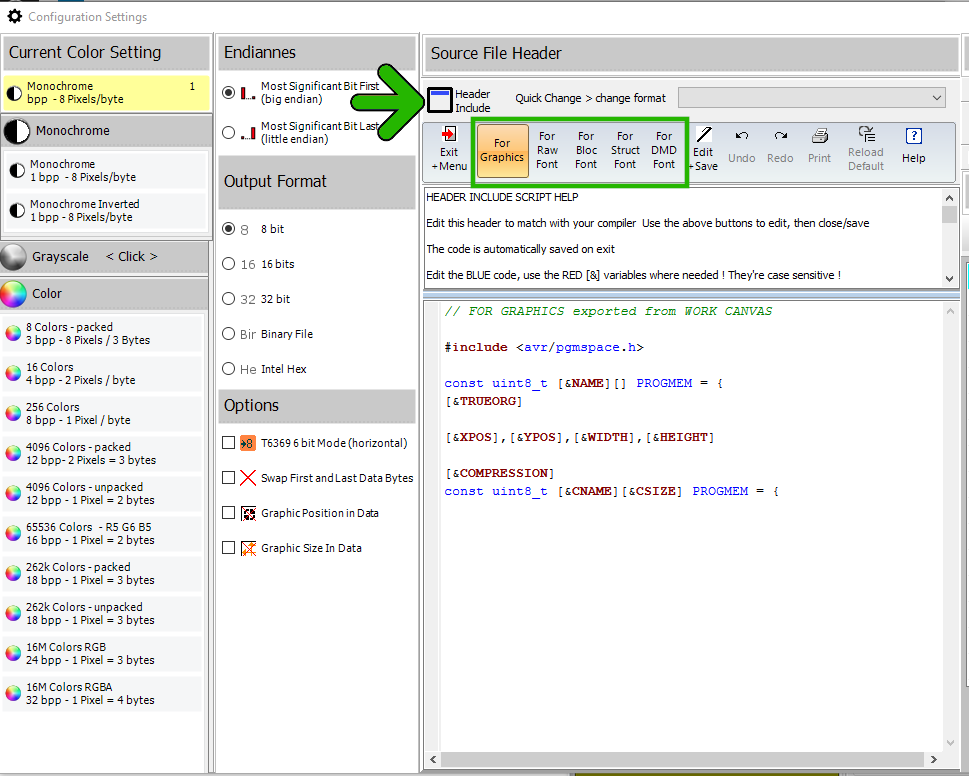
Output File Header
Note : the variables with the [&xxxxx] syntax are optional script components, replaced by their value on export. (details at the end of this article)
update V3.7f

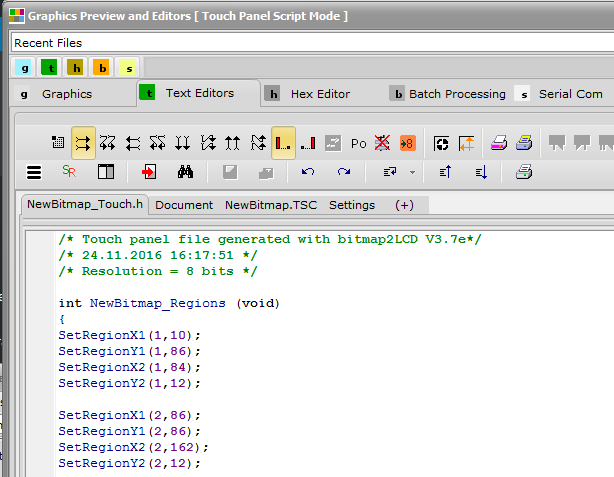
Touch panel settings 
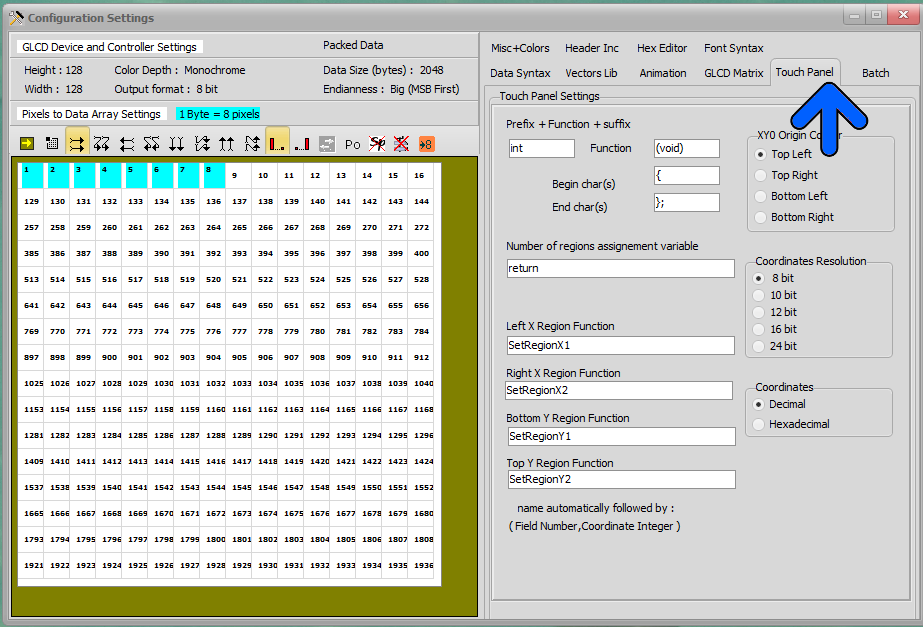


To trace Touch panel regions inside the work canvas, after entering in the touch panel script or by opening the TSC file ( Work canvas outline becomes light blue ) use the mouse inside the work canvas in a similar way to the area selection tool.
Trace the region and when ok, click on the convert to region button (green Arrow)
Theses regions can be moved or resized afterwards.

Bitmap2LCD is a tool for programming small Graphic LCDs in embedded systems.
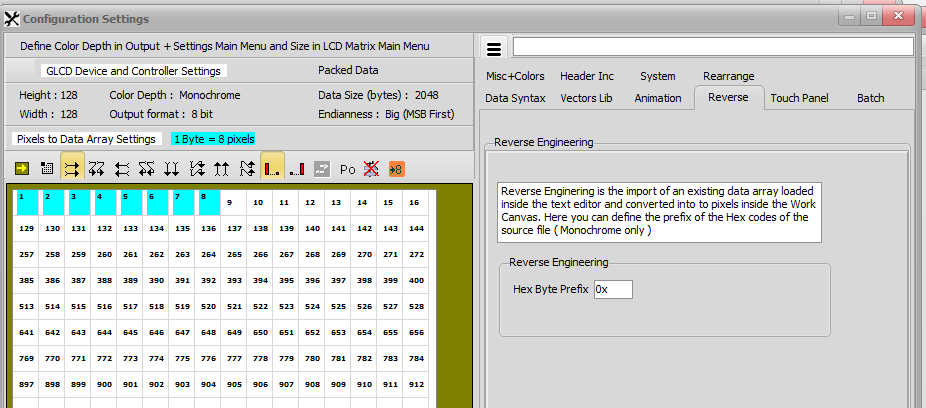
Reverse engineering : Convert an existing Data Array (or Hex File) to a Bitmap
Update V3.7e , monochrome only
Want to convert 8 bit GLCD data array from an old project to a 16 bit GLCD data array in a new project ?
Want to recover the image from of an old GLCD data array source ?
For monochrome GLCD data arrays of 8, 16 and 32 bit – bytes/words – , it is possible with bitmap2LCD !
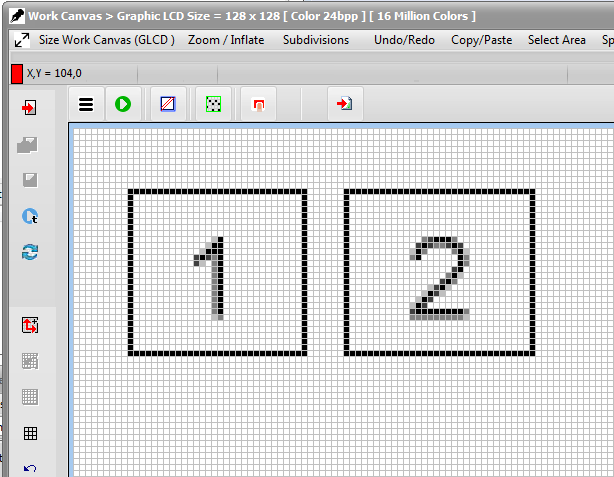
Set your work Canvas Height and Width to a compatible size with the number of data in the array loaded in the text editor, set the byte word Width to 8 16 or 32bits (in the output main menu) , select the data direction (horizontal or vertical) and click one of the import Data Array buttons. If it matches with the data count, the Work Canvas will show the graphic.
For example in a file an array of 2560 bytes ( 0x00 – 0xFF )
( Width * Height ) Pixels per byte = (160 * 128) / 8 = 2560 bytes
Import the array into the work canvas and save the work canvas as bitmap.

Settings :
Define the Hex byte prefix to be found inside the source file
Bitmap2LCD is a tool for programming small Graphic LCDs in embedded systems.
[ Editable Fonts : up to 256 colors ]
Standard Edition V3.9>

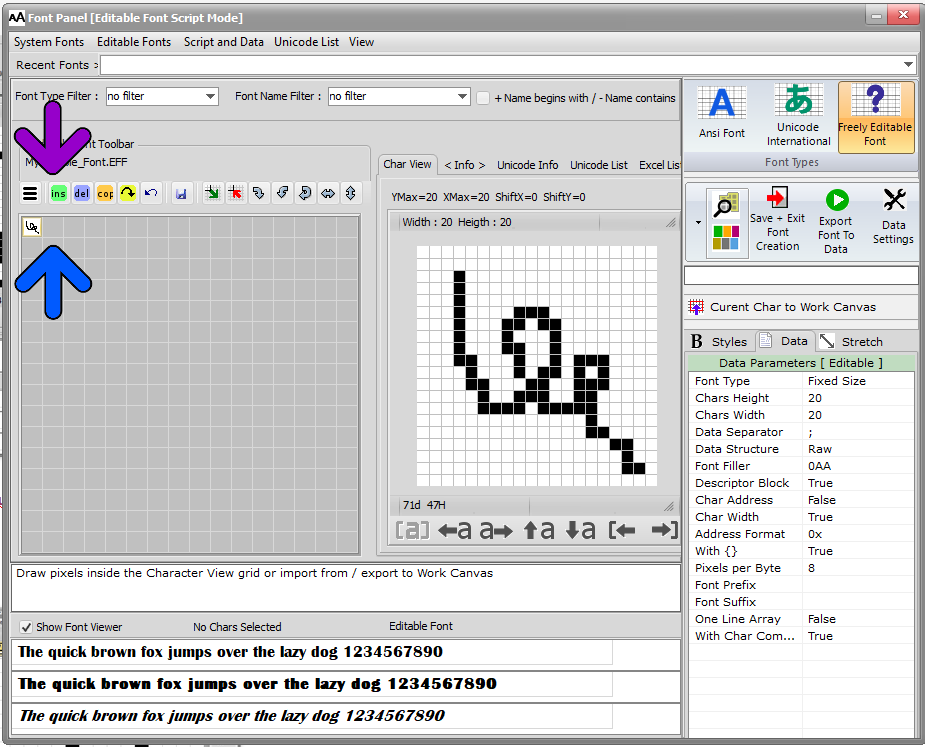
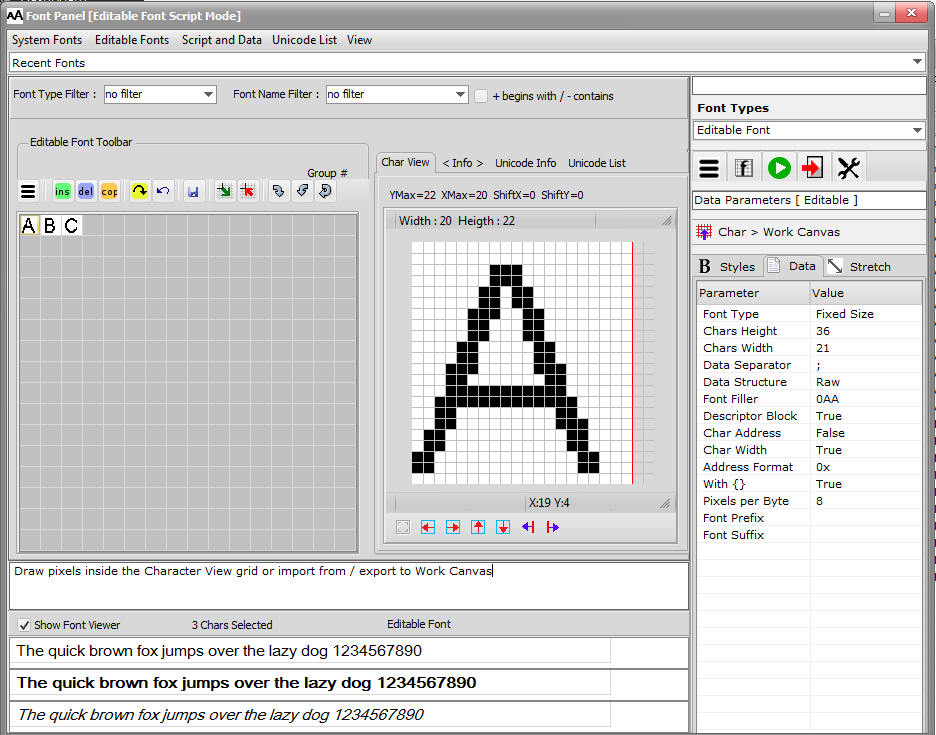
Then use the drop down menu at the left or the buttons (purple arrow) to manage the editable font creation.
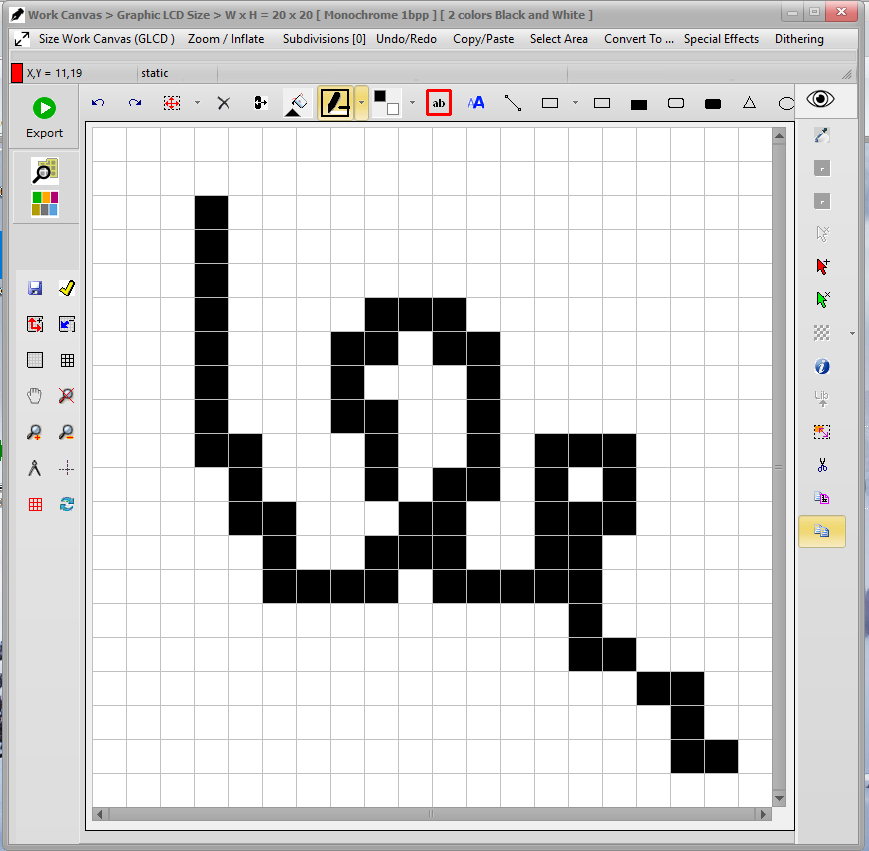
You can export and import the selected char to/from the Work Canvas.
Bitmap2LCD is a tool for programming small Graphic LCDs in embedded systems.
Update V3.7e – V3.8z Standard Edition
From Version V3.9 watch this video
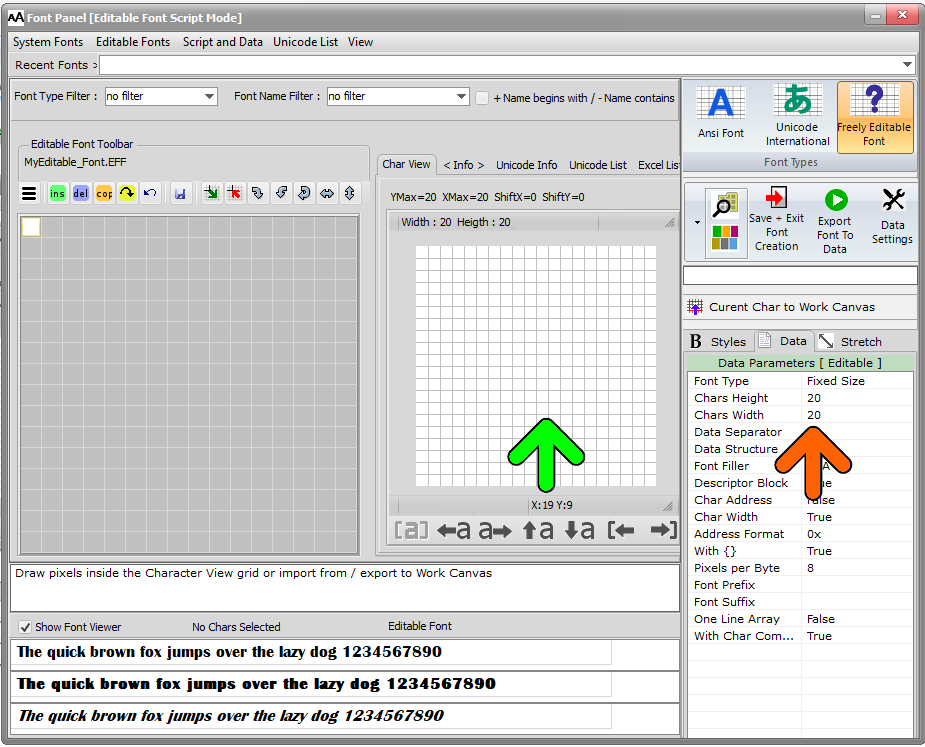
[ Editable Fonts : up to 256 colors ]

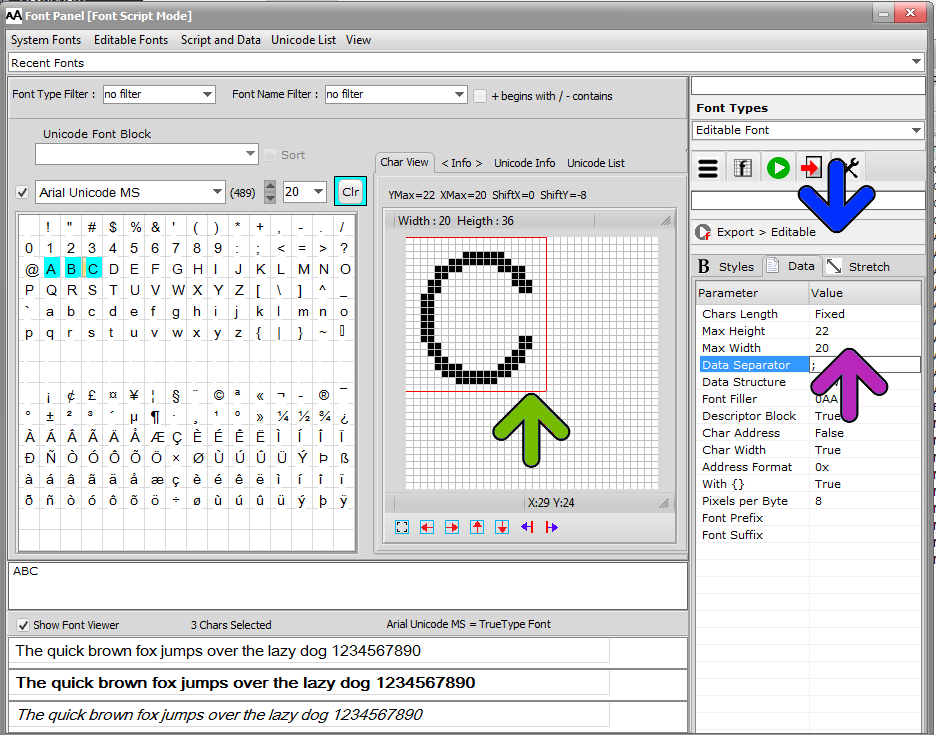
Let’s see how we can export selected characters out of a Windows System font into the Font Editor of Bitmap2LCD :
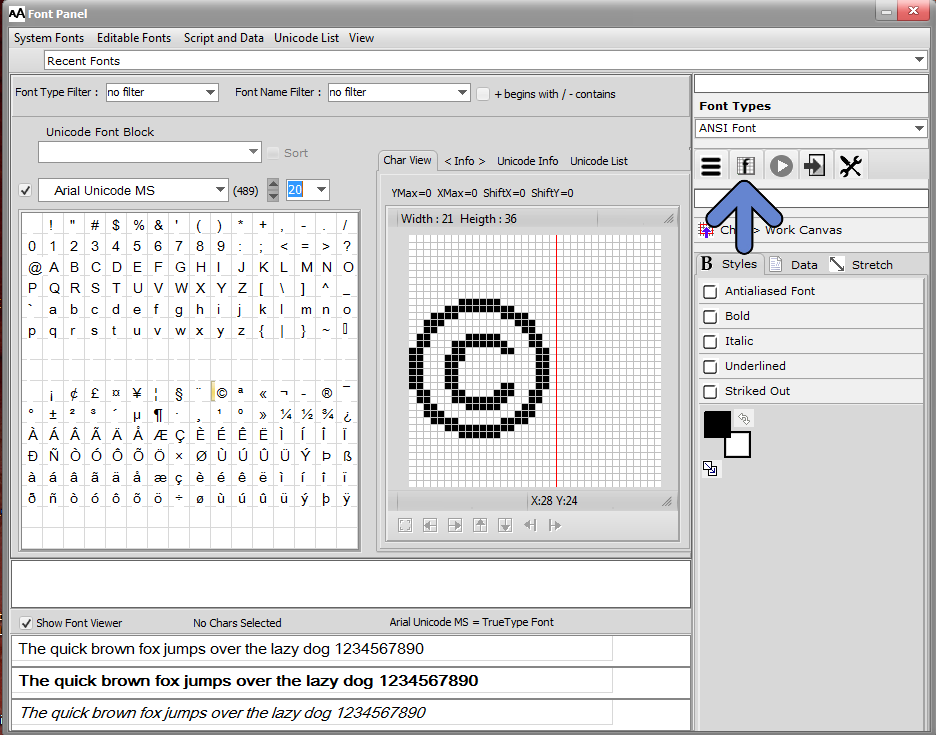
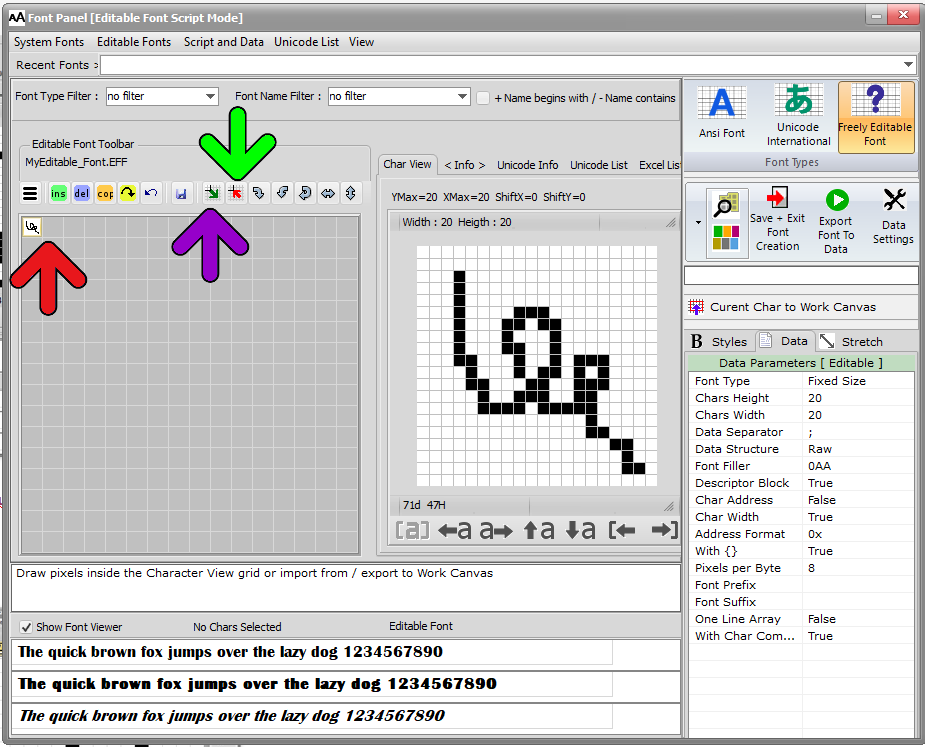
 Export > Editable (Translate LCD Font Script to an Editable Font“ (green arrow)
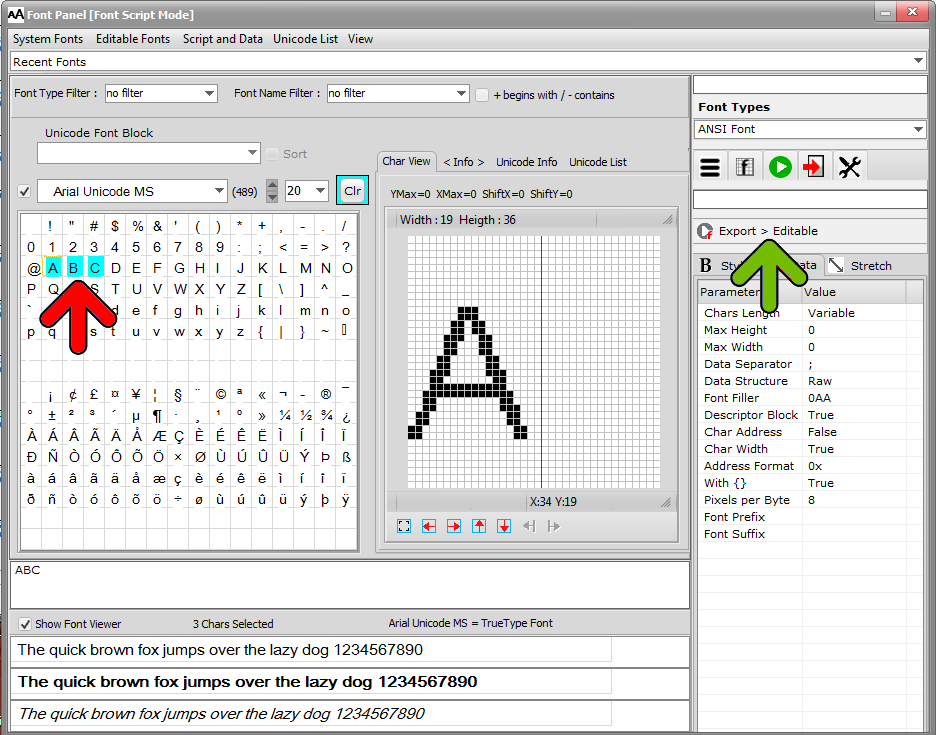
The “editable font” has been created. It is an Editable Font File (EFF) and an associated GIF file, which is the catalogue of char bitmaps. Both files are located in the Fonts folder.
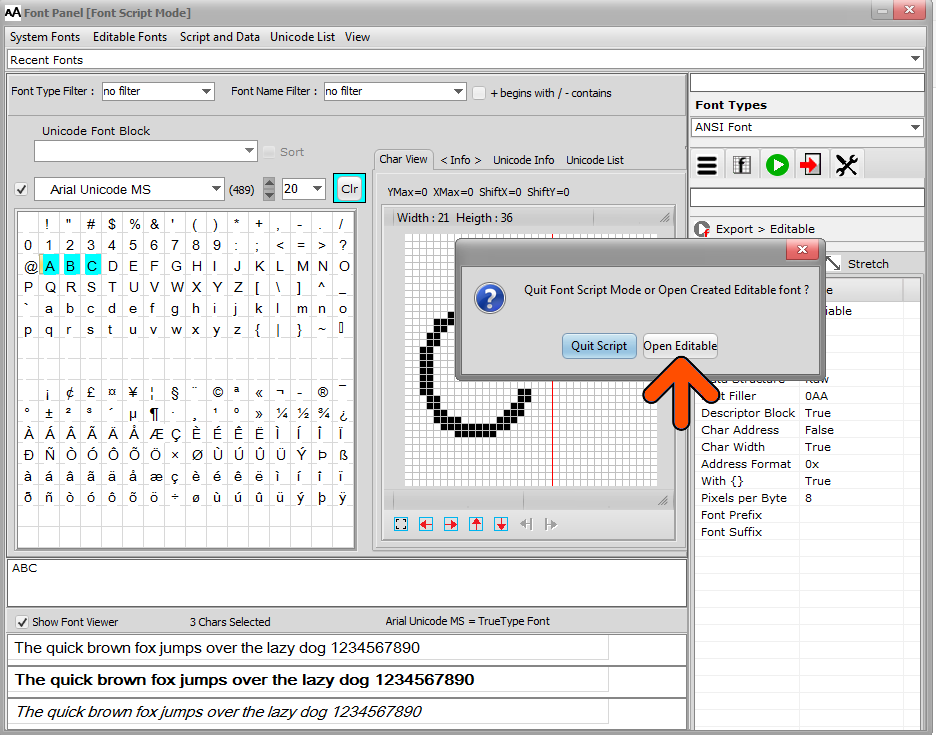
In this example, the selected font name and font size were Aria Unicode MS and 20, in this case the filename of the file will be Arial Unicode MS_20Editable_Font.EFF
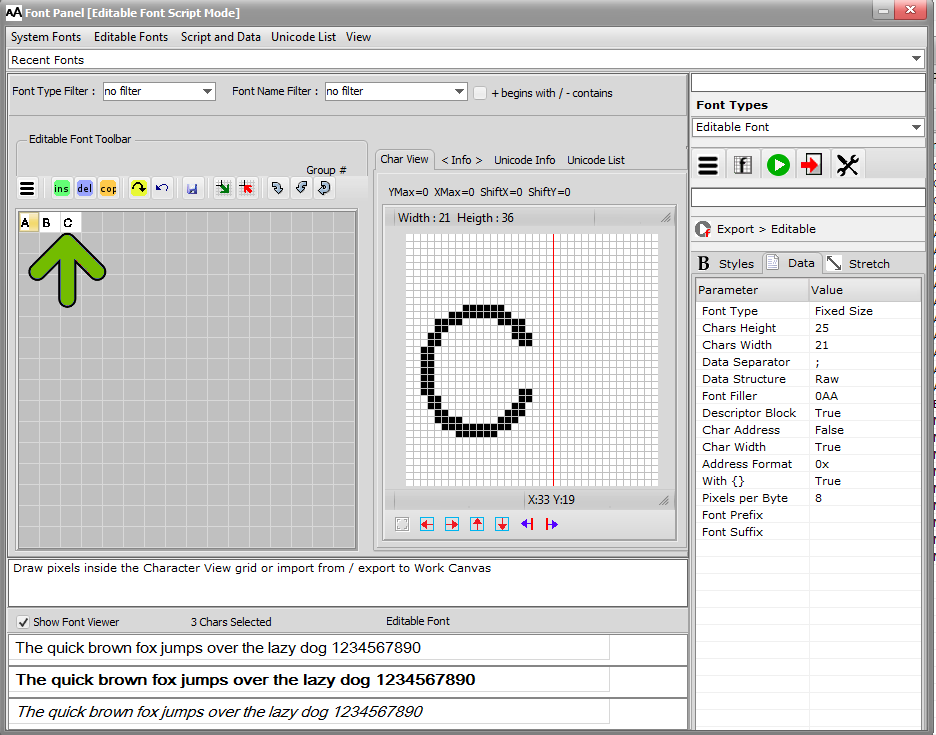
The patterns of theses 3 chars (green Arrow) can now be freely edited.
In the first example above, the height of the chars is 25 pixels.
This time, we want to limit the Size of chars in Height and in Width and export a Fixed Size Font.